Showing posts with label crafty DIY. Show all posts

Father's Day DIY | Gifts for dad

June 15, 2009

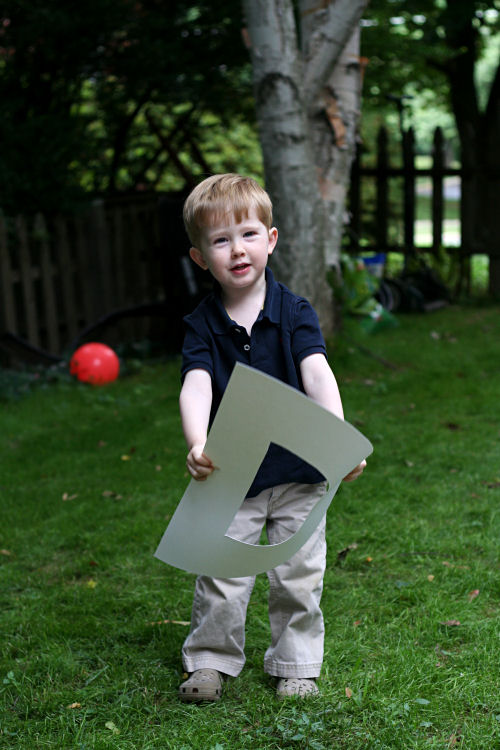
Here's a gift we created a few years ago for Father's Day that's still a favorite. I shared it around the holidays but thought it would be worth mentioning again. It's easy, inexpensive and the results are so incredibly sweet.


Materials:
Poster paper (one sheet for each letter)
Kids (number varies)
Scissors
Camera
Wide picture frame

Instructions:
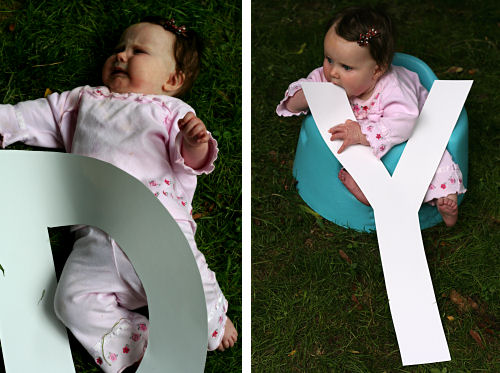
Cut out letters using a full-sized sheet of poster paper and hand them off to the kids.
Take as many shots as you can (vertical works best) and stop only when you've got a bunch of photos for each letter (or someone cries and tries to eat the paper).


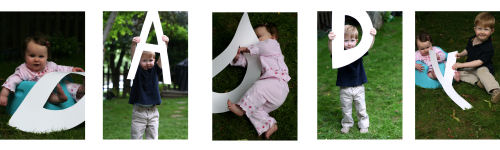
Find your favorites and pop them into a frame. I printed them out as 4x6 inch photos and put them into a long Ribba frame from Ikea.

I don't have a photograph of the final framed product because it's at Brian's office but here's a small, digital version:


I promise....it was as much fun as it looks.

DIY on Indie Fixx

April 3, 2009

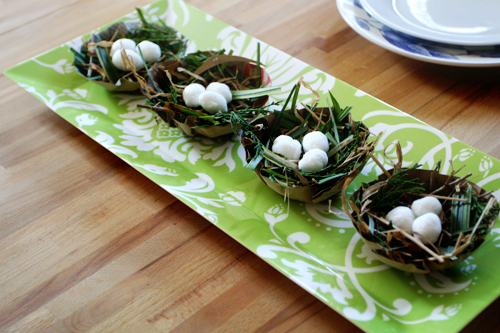
I was super flattered when Jen over at Indie Fixx invited me to join her as a guest blogger today. I created a tutorial for some lovely little spring nests using all recycled materials. It's a perfect, kid-friendly spring craft, and you can get most of what you need on an outdoor stroll. Head on over!


custom party decorations

March 18, 2009

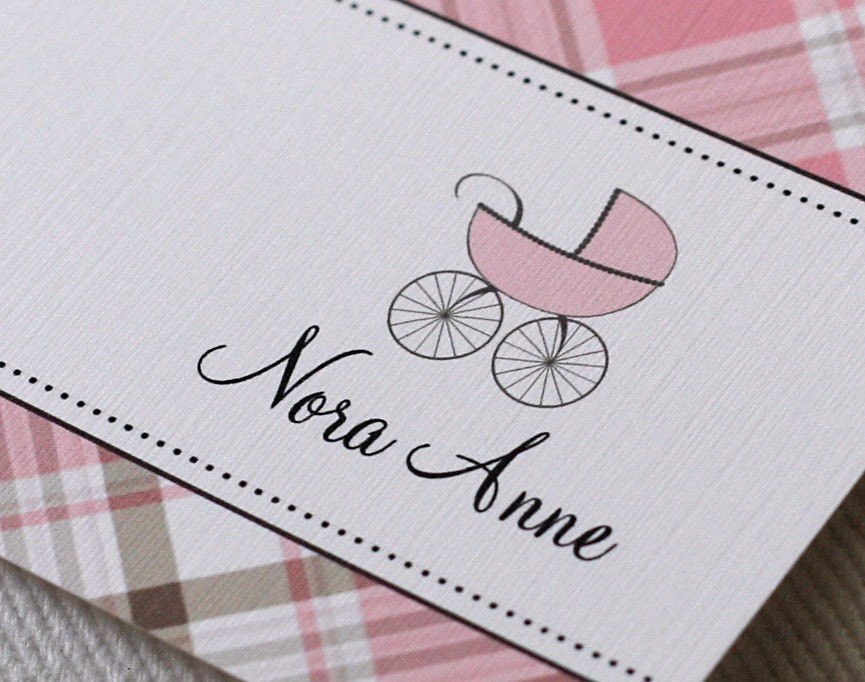
A few weeks ago I completed a fun project for an Etsy customer of mine. She asked me to create shower decorations to coordinate with the plaid pram stationery from my shop.


I designed a banner with the baby's name. The letters were printed on thick cardstock and held together with chocolate brown ribbon.


Then I created some cupcake toppers. I printed a custom message on the front and the plaid pattern on the back. I used 80 lb cardstock (not too thick, not too thin), and cut out the circles using a 2" hole punch.

I struggled with finding the best way to adhere the two pieces to each other and the toothpick. I ended up using my Xyron (sticker-making) machine. There was a good deal of glue left around the edges (the downside of using the Xyron) so it took a while with each piece and my adhesive eraser to get rid of the sticky edges.

I was really happy with the way they turned out but I'm not sure that I'll be listing them in my shop. Maybe I'm just slow (or too much of a perfectionist) but the toppers took way too long to assemble. Besides, glue and I don't really get along.
I would consider listing banners in my Etsy shop though... no adhesives required. I'll keep you posted ;)

Valentine craftiness

February 5, 2009

We're totally getting our craft on today. On the agenda:


Bonbon filled hearts by Martha Stewart
(I think we'll fill ours with candy hearts)


(crafts can be edible, right?)

nothing says love like handmade

January 28, 2009

I just sent out a newsletter with a coupon for printable valentines on my Etsy shop.


Go ahead. Sign up... I'll get one to you too :)

DIY notepad (recycled kid-friendly version)

January 26, 2009

My kids love to draw. They also love to use an inordinate amount of paper. So when I decided to create some notepads for my little guys, I wanted to cut down on the waste and create something especially kid-friendly.


For this version (using the same technique from my last post), I used all recycled papers for the inside (old letterhead, partially used construction and notebook paper) and fun cardboard pieces (cereal, fruit snack or toy boxes) for the cover.


As a special feature, I used an envelope (with a square flap and the glue strip cut off) for the outside...


which created a special spot for crayons (and made it perfect for the car!).


PS. this cover is from a box of Scooby-Doo fruit snacks. I'm embarrassed by just how many of those we have lying around.

Crafty Mama re-cap and tutorial

January 21, 2009

Sunday's Crafty Mama Night at Bediboo was awesome. We crafted, chatted and enjoyed a creative kid-free evening with new friends.

My original intention was to make handsewn journals. Plans changed when I drove the blunt end of a needle through my right thumbnail and into my opposite hand. Ouch. While I was extracting the threaded needle from my hands, I glanced over at some glue and decided to turn my journals into...notepads!

And for those of you who couldn't join us, here's your very own tutorial...

TOOLS:
  • Paper cutter or scissors
  • Plain paper for the pad (I used 8 1/2 x 11 sheets for this tutorial)
  • Decorative paper for the cover
  • Cardstock for the backing
  • Adhesive to bind the pad (I used this but rubber cement or white glue would work well too)
  • Double-sided tape or a glue stick to secure your cover to the pad (I love Mono Adhesive)
  • Binder clips or clothespins
  • Ribbon or twine (optional)

DIRECTIONS:

1. Take a few pieces of plain paper (5 or 6 sheets) and divide each sheet into fourths. Stack together.

2. Cut a rectangle of decorative paper to the same size as your cut sheets from step one (should be 5.5 x 4.25) and add it to the front of your stack.

3. Place the edge of the stack on a hard surface so that the papers are flush. Clip together with clothespins or binder clips.

4. Line the flush edge of your pad with adhesive. The Scotch adhesive that I used goes on clear and dries pretty quickly (just try not to inhale while your using it). You want just enough to cover the edge without wetting (and warping) the sheets. Leave the clips in place and set it down to dry.

5. Cut a piece of cardstock the same width as your pad and about an inch longer (for this I used a piece of paper that was 4.25 x 6.5).


6. When your pad is finished drying, glue (or tape) your cardstock backing onto your pad, allowing the extra length of paper to come up and fold over towards the front. Secure the extra length of paper to the front of the pad with the same type of glue or double-sided tape.


7. Finish it up with some pretty ribbon, twine, or embroidery floss and you've got somewhere to jot down your hopes, dreams, and grocery lists.


Once you've got the basic idea down, experiment with different sizes and types of paper. I was amazed at the beautiful creations those crafty mamas came up with (I'm hoping to get a picture or two to share).

Tune in tomorrow for an eco-friendly kid version too!

DIY holiday gifts from etsy

November 6, 2008

If you're planning on getting crafty this holiday (and who can afford not to?). Think about buying a pattern, printable, or tutorial on Etsy. It's a great way to create something by hand for a loved one and support a small business. Here are some my favorites to get you started...

Printable Calendar from Little Brown Pen


John Doll (PDF pattern) from Bit of Whimsy


Feed the Bird (DIY papercut) from Fog and Thistle


martha on blogging

September 17, 2008


Martha Stewart devoted an entire episode of her show to blogging today and I tuned in with pure envy. The audience of bloggers seemed to be having a blast (even if they were seated with propped laptops, type-synching Milli Vanilli-style). I giggled while watching the Perez Hilton/Martha Stewart interaction and when Martha chatted with Politco bloggers and referred to our possible veep as "Sharon" Palin.

But what I really enjoyed was learning about some new-to-me blogs (that apparently shouldn't be) like A Year of Mornings by Maria Alexandra Vettese and Stephanie Congdon Barnes, and Matt Bites with his amazing food photography and epicurean adventures. I also loved getting to see Deb of Smitten Kitchen (an old favorite) and scanning the audience for familiar faces.

One of my favorite design bloggers, Erin from Design is Everywhere, was there today and I can't wait to read her website later for the inside scoop. Come on Erin-- dish it up!
 
◄Design by Pocket►